 By Elle
As usual, we were working furiously on a renovation project in time for an event — this time our deck in prep for my granddaughter’s 13th birthday party. I’m excited to say that it is (mostly) finished. What began as a simple reskin of our lower deck turned into a complete redo and an extension, creating a third level of deck along with a privacy wall. Are we overachievers or what?
I remember Arkady saying once that we should always leave a maker’s mark on our projects. We did that in the form of heritage tiles in our back hallway and on the laundry room sink after those renovations. But not so much after that, perhaps because a lot of our renovations haven’t quite crossed the finish line, which got me thinking.
“Honey, I came up with our maker’s mark,” I said one day.
Arkady was intrigued. “Really? What is it?”
“It’s whatever little thing we’ve left undone,” I said brightly. “Like the three-square-inches of unpainted wall in the office, the section of untiled wall behind the commode, the untiled floor behind the washing machine, and the cement patch in the dining room where the fireplace hearth should be.”
He grumbled, no longer intrigued, but then laughed. (He’s laughing again as he’s reading this over my shoulder.) Because … you have to laugh.
So when we say we’re finished, I reckon we mean we’re finished for the moment. Of course, those moments typically stretch out into years. It’s a sort of procrastination, not to begin but, rather, to end. I could analyze this more: We love working on projects together and don’t want them to ever end (as if we could possibly ever run out of projects), but I suspect we just get exhausted and quit. We’re not overachievers at all. We’re quitters!
Whatever the reasoning, we’ve come up with our maker’s mark, and I’m sticking to it.

We left the rails until nearly last because we weren’t sure about their design. In the background, you can see the frame of the privacy wall.

Arkady has an inventory of “stuff” like no one I’ve ever seen. We used his storehouse of short redwood boards to create the railing and the longer boards to build out the privacy wall. (Ignore the pillows. We weren’t sleeping on the deck; we used them as knee pads.)


We finally decided on a design for the privacy wall. We used all the long redwood boards we had, along with 2 x 2 strips of treated lumber, in a pattern that starts tight at the bottom and gradually opens up, giving the wall a sense of movement. Because we installed it for decorative rather than privacy purposes, we preserved an open area — a sort of transom window, if you will — near the top, where we could hang chimes or, say, a glass owl. (See next photo!)

Another find from the Craft & Antique Co-op in Painesville. He’s adorable not only in the daytime, but also at night when his solar lights twinkle brightly.

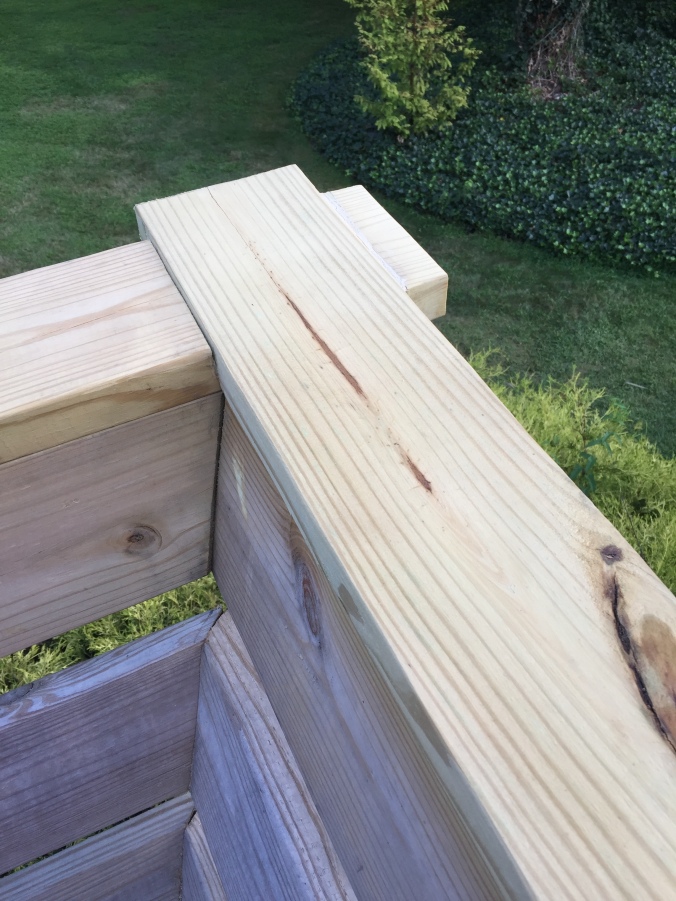
Arkady replaced the cap rails on our deck, which had been cut at 45-degree angles, with new boards cut in half-lap style with overhangs, Lincoln Log style. Why? 45-degree angle cuts tend to curl. You’ll never use them again once you watch this video from Samurai Carpenter!

Found this froggy fellow at the Craft & Antique Co-op in Painesville. I repainted him with copper spray paint and gave him a new rope by which to hang.

The siding on the back of our house is a mess, partly from us removing a kickout wall that had been there for no damn good reason. I also removed the black shutters that had framed the windows, leaving some discoloration (despite serious scrubbing) and a lot of unsightly screw holes. I plugged the holes with screw caps, but the area is still a mess. So I hung some metallic dragonflies, also courtesy of the Craft & Antique Co-op. Love that place!

This part of the deck houses the slide and the return ladder. Because we have elderly parents, we have a lot of stainless safety rails around, so we used an extra pair for the slide.

My bum fits on the slide so long as I go down kind of sideways.

Bought this bell on a whim at a garage sale a few years ago, and finally found the perfect spot for it! It’s near the slide, so the kids can ring the bell before they take off or when they come back up.

Here’s our standing bar area, another of my beloved’s unplanned but brilliant additions.

Another attempt to hide our unsightly siding, also courtesy of the Craft & Antique Co-op.

My beloved wind chimes finally found a place worthy of their loveliness. Bought the chimes at the Cleveland Botanical Garden gift store.


The brace attached to the privacy wall is temporary until we decide its design, either Craftsman or Asian style.


Took this photo after a hard rain, which makes the wood look deep and rich. We need to stain the entire deck so that it looks this way all the time.
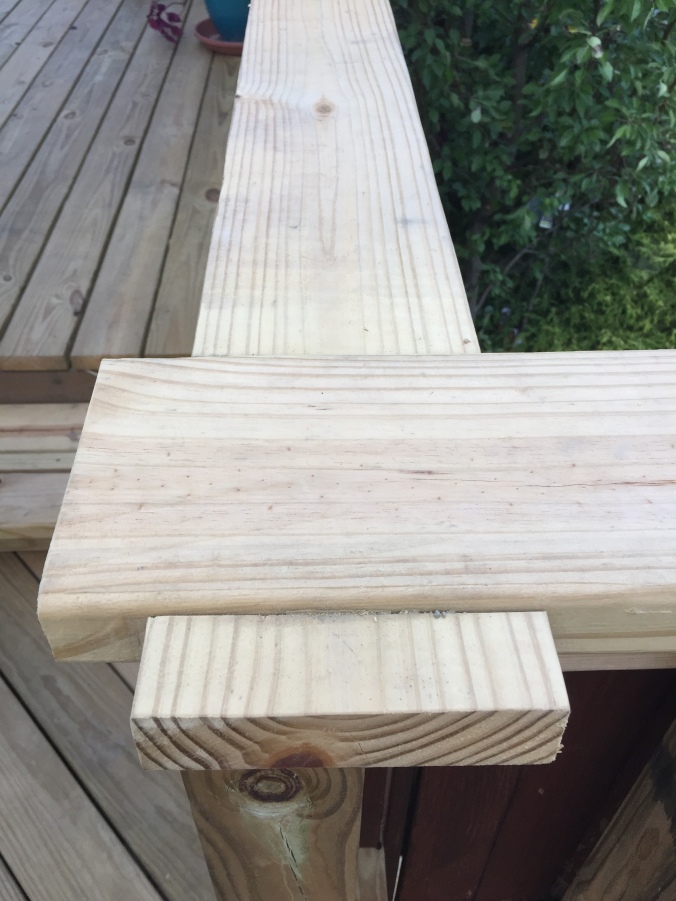
So aside from the brace attached to the privacy wall, what else did we leave undone? We have a small section in the corner of the main deck that is roughed in for a built-in butler cabinet. We have a lovely piece of granite for the countertop. We just have to figure out the deets. And in the above photo, we need to trim the cap rail. We left it long thinking we might add a vertical end piece to the seating. Maybe we’ll get to it. Or maybe not.

Love it!!!
Thanks, Maria! And I love your two doll-baby nieces. Thank you so much for bringing them by to visit. Made my day!